Help & Documentation
Quick links: Install · Full Disk Access · Activate your license · Smart Cleanup · Duplicates · Ghost Files · Disk Analyzer · Bulk Rename · Troubleshooting
1. Install
- Download FileForge.dmg from the website.
- Double-click the DMG to open it.
- Drag the FileForge icon onto the Applications alias.
- Eject the DMG (right-click → Eject), then open
/Applications/FileForge.app.
The app is signed with an Apple Developer ID and notarized by Apple, so it opens on first launch with no Gatekeeper warnings on macOS 14 (Sonoma) or newer.
2. System requirements
- macOS 14 (Sonoma) or newer
- Apple Silicon Mac (M1, M2, M3, or later) — Intel Macs aren't supported
- ~50 MB of free disk space
3. Grant Full Disk Access
Some FileForge features need to read protected folders (logs, app caches, container data). macOS asks you to grant access explicitly — this is a one-time setting.
- When you see the "Some folders couldn't be scanned" banner, click Open System Settings.
- System Settings opens to Privacy & Security → Full Disk Access. Find FileForge in the list and toggle the switch on.
- FileForge detects the change and offers to Quit & Reopen. Click it — macOS requires a relaunch for the new permission to take effect.
You only do this once. The grant persists across launches and updates.
4. Activate your license
After purchasing FileForge Pro or Pro Family, you'll get an email with your license key (format: FFRG-XXXX-XXXX-XXXX-XXXX).
- Open FileForge → click the gear icon in the bottom-left to open Settings.
- Scroll to the FILEFORGE PRO section.
- Click Activate license, paste your key, click Activate.
The app talks to our license server to verify the key and bind it to this Mac. From that moment all Pro features unlock.
Moving to a new Mac
Pro covers 1 Mac and Pro Family covers up to 5 Macs in your household. To free up a slot:
- On the old Mac: open Settings → License → Deactivate this Mac.
- On the new Mac: install FileForge, paste the same key, activate.
If your old Mac is broken, sold, or unreachable, email support@fileforgeapp.com with your purchase email and we'll clear the slot manually.
5. Smart Cleanup
Finds temporary files, caches, and build artifacts that are safe to delete — log files, browser caches, npm/yarn cache, Xcode derived data, empty folders, items already in Trash, and old downloads.

How to use it
- Click Cleanup in the sidebar. FileForge scans your home folder for cleanable categories.
- Each category shows the size it would reclaim. Categories marked SAFE TO DELETE can be checked in one click. Categories marked REVIEW REQUIRED (Old Downloads, Trash, Empty Folders) need you to expand them and pick individual files first — these are user data, not caches.
- Tick the categories you want to clean.
- Click Clean in the bottom-right. FileForge moves files to Trash (recoverable for 30 days) — except the Trash category itself, which is a permanent delete since the items are already in Trash.
Free vs Pro
Free tier: up to 1 GB of cumulative cleanup. Pro: unlimited.
6. Find Duplicates
Scans for byte-identical files (same SHA-256 hash) across the locations you select. Useful for cleaning up multiple copies of photos, downloads, or backups.
How to use it
- Click Duplicates in the sidebar.
- Pick which folders to scan — by default it covers Documents, Downloads, Desktop, and Pictures.
- Click Start Scan. Scanning a busy folder can take a few minutes for the first run; subsequent rescans are fast thanks to the cache.
- Each duplicate group shows the file size and how many copies exist. The original (oldest, by modification date) is preselected as "keep"; copies are preselected as "delete". Adjust by clicking which copy you want to keep.
- Click Delete Selected to send the chosen copies to Trash.
FileForge ignores tiny files by default (under 100 KB — adjustable in Settings). They're rarely worth cleaning and slow down scans.
7. Ghost Files (App Manager)
When you delete an app by dragging it to Trash, macOS leaves support files behind: caches, preferences, application support, log files. Over the years this can accumulate to many gigabytes. Ghost Files finds these orphaned support files for apps that are no longer installed.
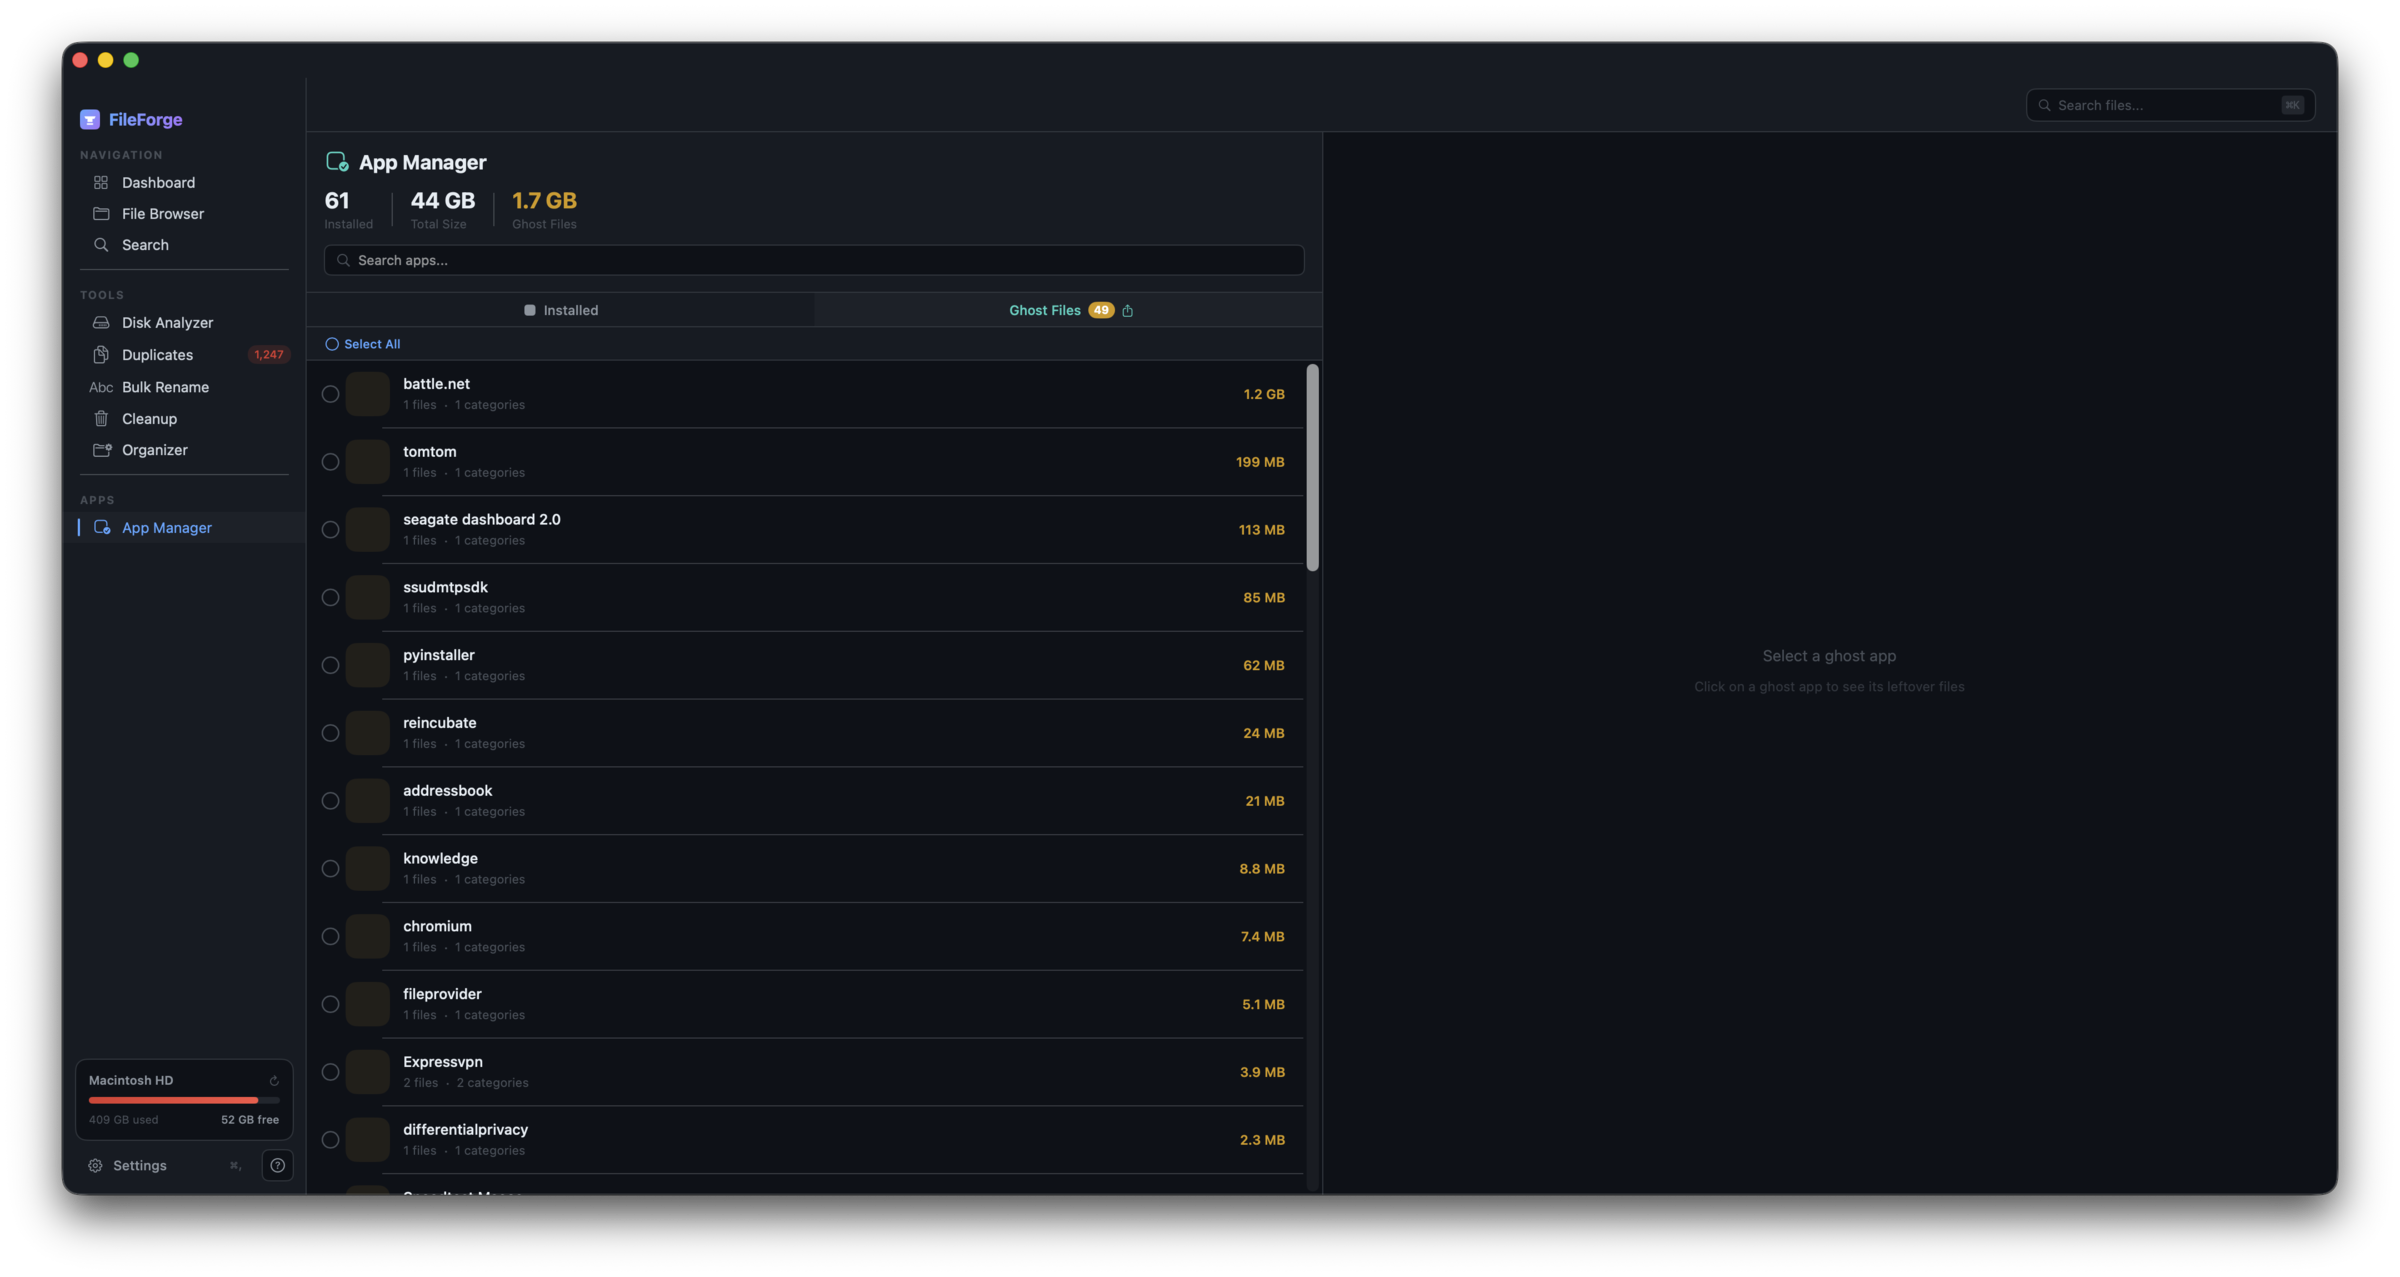
How to use it
- Click App Manager in the sidebar → switch to the Ghost Files tab.
- FileForge scans
~/Libraryfor support files. Each result shows a badge:- ORPHAN — the parent app isn't installed anywhere FileForge can find it. High confidence these files are leftovers.
- LOOKS INSTALLED — the parent app appears to still exist. These are not ghost files; FileForge surfaces them so you can review before deleting.
- Tick the orphaned items you want to clean. The bulk-remove dialog warns you if any LOOKS-INSTALLED items are in your selection.
- Click Remove Selected. Files go to Trash.
8. Disk Analyzer
Shows a treemap of where your disk space goes. Big folders get big rectangles; tiny folders get tiny rectangles. Click any rectangle to drill in.
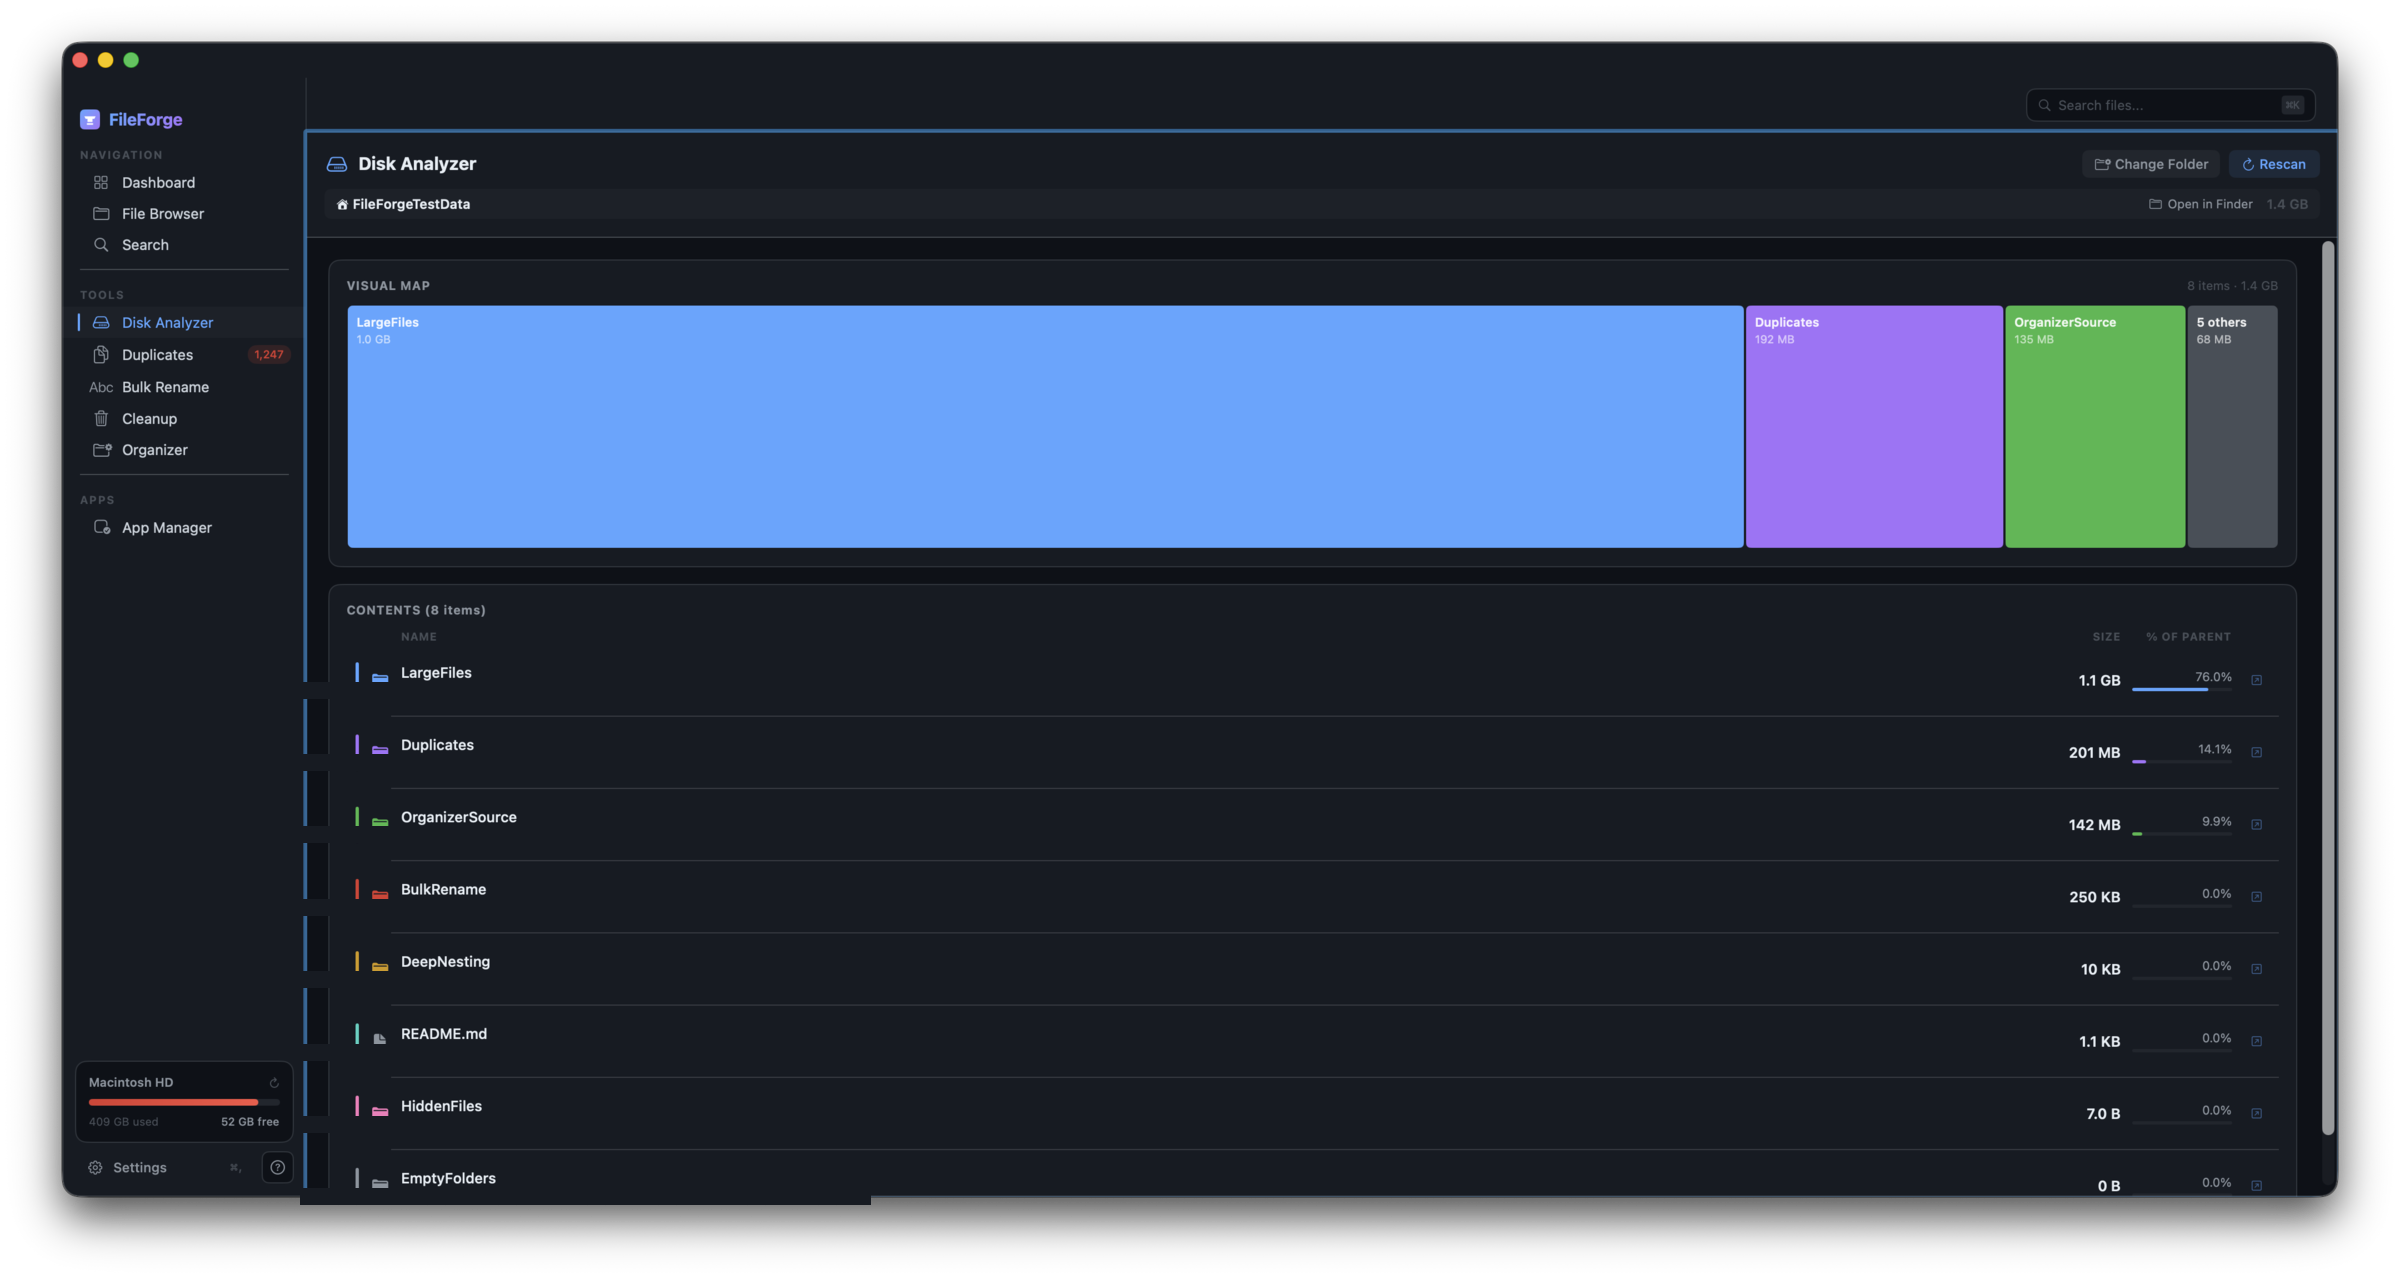
How to use it
- Click Disk Analyzer in the sidebar.
- Pick a starting folder (default: your home folder).
- Click any rectangle to drill into that folder. The breadcrumb at the top lets you go back up.
- Right-click any rectangle → Reveal in Finder to open it in Finder, or Move to Trash to delete it directly.
Pro adds CSV export of the scan results.
9. Bulk Rename
Apply a renaming pattern to many files at once — sequential numbering, find-and-replace, prefix/suffix, regex, or change-case.
How to use it
- Click Bulk Rename in the sidebar.
- Drag files into the drop zone, or click Add Files….
- Pick a rename pattern. The preview column shows what each file will become before you commit.
- Click Rename All. Every operation is reversible via the Undo button (Pro extends undo across multiple runs).
10. Search
Fast filename + content search across your home folder. Powered by Spotlight under the hood, with extra filters FileForge adds on top.
Filter pills
Quick filters in the top bar narrow results to common file types: Images (jpg/png/heic/webp/…), Documents (pdf/docx/pages/numbers/…), Archives (zip/tar/gz/7z/…), Media (mp4/mov/mp3/m4a/…). Click again to clear a pill.
11. Organizer
Auto-sorts a messy folder into subfolders by file type, date, or size. Useful for cleaning up Downloads or a desktop full of mixed files.
How to use it
- Click Organizer in the sidebar.
- Pick a source folder (e.g. Downloads).
- Pick an organization scheme (by file type, by date created, by size bucket).
- Preview the moves before committing. Click Apply to perform them.
Free tier limits to 20 files per run. Pro: unlimited.
12. Settings reference
- Confirm before delete — extra confirm dialog before any destructive operation. On by default.
- Show hidden files — surface dotfiles (
.DS_Store,.git, etc.) in the File Browser. - Cleanup requires review — locks unsafe-cleanup categories behind an explicit "I've reviewed these" checkbox. On by default.
- Ignore duplicates under N KB — skip tiny files in duplicate scans (default 100 KB).
- Re-scan after N minutes — how long FileForge reuses cached scan results before doing a fresh scan (default 5 min).
13. Troubleshooting
Activation says "Couldn't reach the license server"
FileForge needs internet to verify your key. Check your connection. If you're behind a corporate firewall, ensure licenses.fileforgeapp.com is reachable. Once activated, the app works offline for up to 14 days before re-checking.
Activation says "max devices"
Your license is already active on its maximum number of Macs. Deactivate one (Settings → License → Deactivate this Mac) on a Mac you still have access to, or email support@fileforgeapp.com if the old Mac is unreachable.
I get "Your license was refunded"
The Pro flag on this Mac was cleared because Paddle processed a refund for your purchase. If you didn't request a refund, contact support@fileforgeapp.com.
Some folders show empty when I scan
FileForge needs Full Disk Access to read protected folders (Logs, Containers, Mail, Safari). See section 3 above. After granting it, click the Quit & Reopen banner — the grant only takes effect after a restart.
I deleted something by mistake
Almost everything FileForge deletes goes to Trash, not permanent delete. Open Trash, right-click the item, choose Put Back — macOS restores it to its original location.
The only exception is when you clean the Trash category itself in Smart Cleanup — that's a permanent delete by design (the items are already in Trash, "cleaning" them empties Trash).
FileForge feels slow
First scan of a folder is always slowest because it touches every file. Subsequent scans use cached results and run in seconds. If a scan is genuinely stuck, hit Cancel and re-try — duplicate scans on very large folders (50+ GB) can take several minutes.
Got another question?
Email support@fileforgeapp.com. We reply within a day or two.